These are the old docs and will be removed soon – new docs have moved here
—————————————————————-
To get started, we need to enable translations for the Search & Filter post type.
1) Enable translations
In the WordPress dashboard, under WPML head to:
Translation Management -> Multilingual Content Setup -> Custom Posts
Then enable translations for Search & Filter:

After this you will notice that WPML is integrated as the flags have been added to the Search & Filter admin screen:

2) Duplicate your Search Form for each language
Edit your Search Form in the primary language of your site.
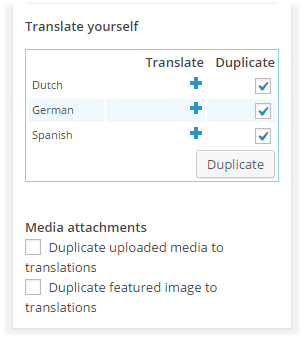
Then on the edit screen duplicate the current Search Form for each language – this copies over the structure of your fields & settings in to the selected languages:

3) Translate manually
Edit a translation:

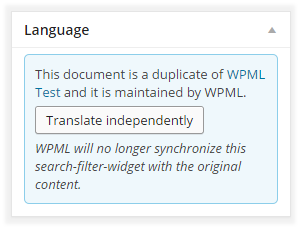
And select translate independently:

Note: Once this step is complete, your Search Forms are no longer synced – this means changing a setting, or adding a field in one language, will not automatically apply to the translations – you must manually update each translation with your changes.
An additional step when using a shortcode to display results
This does not include when using a shortcode to display the Search Form itself
To display your Search Results on the correct page for each language, you must update the `Results URL` for each translation and point it to the correct page – this includes the “lang” query parameter (eg – ?lang=es) where applicable:

Notes
- Search & Filter automatically translates tag, category, and taxonomy IDs when creating duplicates in other languages.
- When displaying results using the Archive method, slugs can be defined individually for each language or share the same one.
Looking for Search & Filter Pro?
Find out more Demo 1 (Movies) Demo 2 (WooCommerce)

